Configuring an Access Point
For each application integrating with Support.com Cloud via the REST API, you must define an Access Point. Navigate to Admin → Access Points and create a new Access Point.

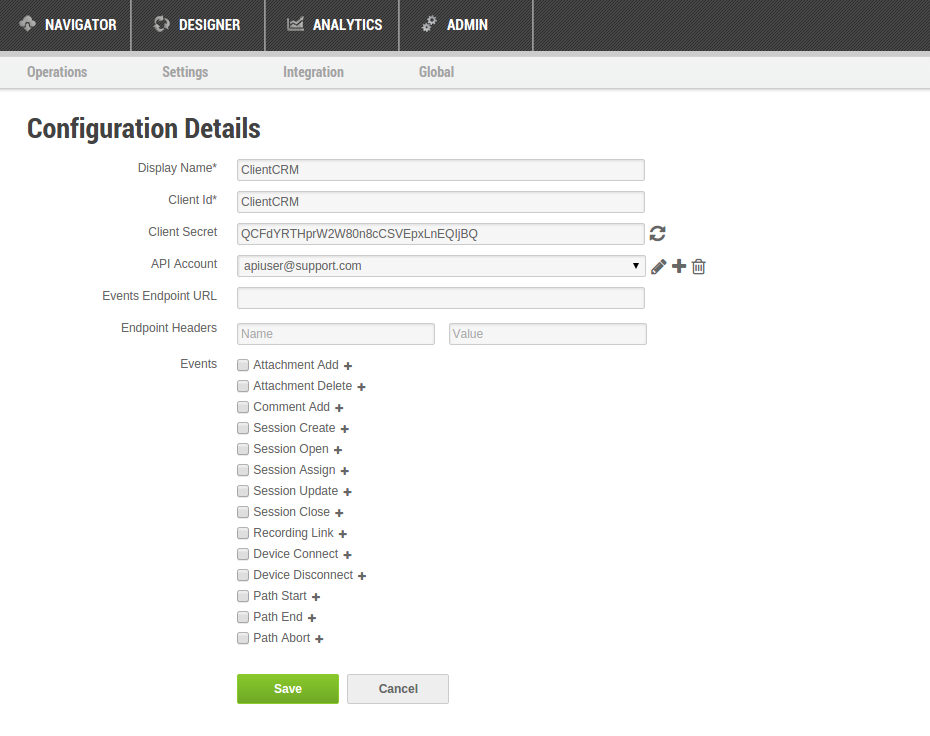
The configuration screen has the following fields, and you must provide values for the fields marked as required.
- Display Name: Name of the Access Point that will appear in the table on the Configure Access Point screen (required).
- Client Id: Id that will be used to uniquely identify the access point configuration. The external application will use this to reach out to Support.com Cloud application while making API calls (required).
- Client Secret: This value is automatically populated, with a random value, once the Display Name and the Client Id are set. It is used in conjunction with the Client Id for OAuth2 authentication. You can click the Refresh button (circular arrows) to the right of this field to generate a new random Client Secret (in case the OAuth2 credentials for your application need to be updated).
- API Account: This user account is used internally by Support.com Cloud for auditing access to the data objects (required) via the REST API. The role assigned to this user account is the API role. Select a pre-configured Support.com Cloud API user or create a new one.
Note: The remaining fields for the Access Point configuration are used for creating event subscriptions, and are described below.
